


大厂物理机的价格一般都很贵,但是配置很顶,相反,小厂的物理机却很便宜(但是也不完全便宜),比如我目前网站使用的物理机就是250元一个月,CPU用的是16年的E5,月费一般是花在带宽和电源上了,带宽是固定的,但是电源是我们决定的。
小厂物理机服务器的CPU频率给你设置的很低,一般是1.2G左右,我这CPU英特尔官网上写的基础频率是2.2G,这相差未免也太大了,但是好在厂商没限制BIOS,我们还可以在BIOS去设置。
BIOS设置
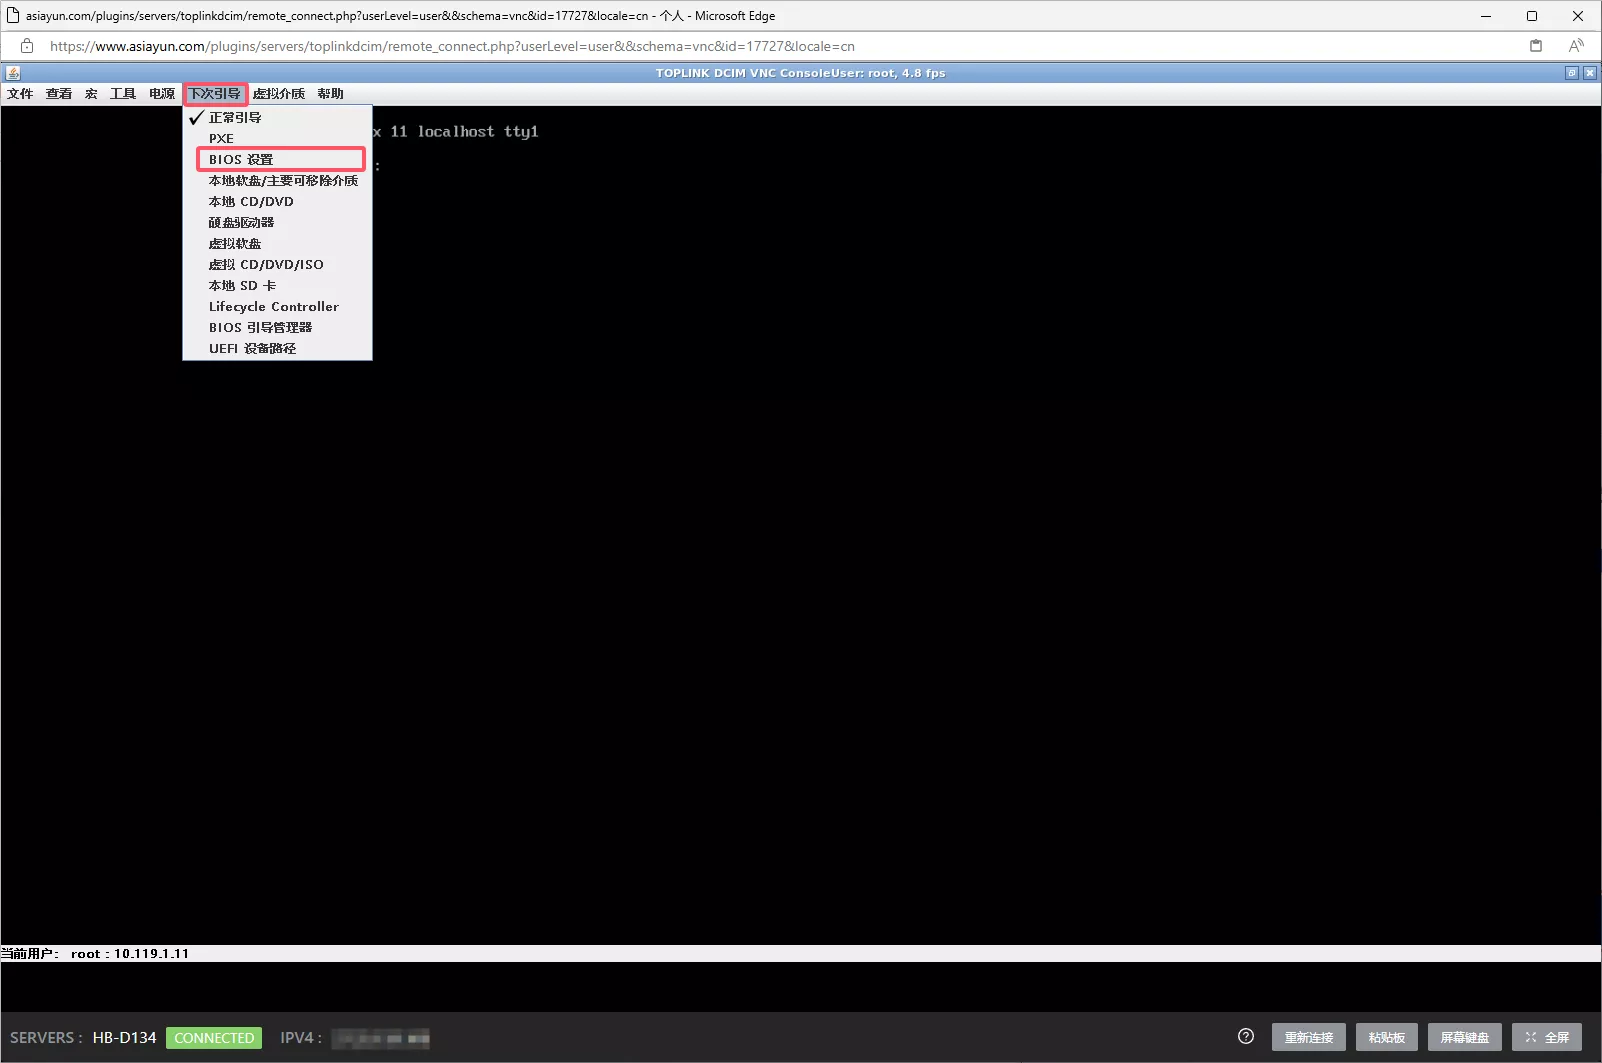
进入服务器厂商的官网,找到自己服务器的VNC设置,点击连结自己的服务器。

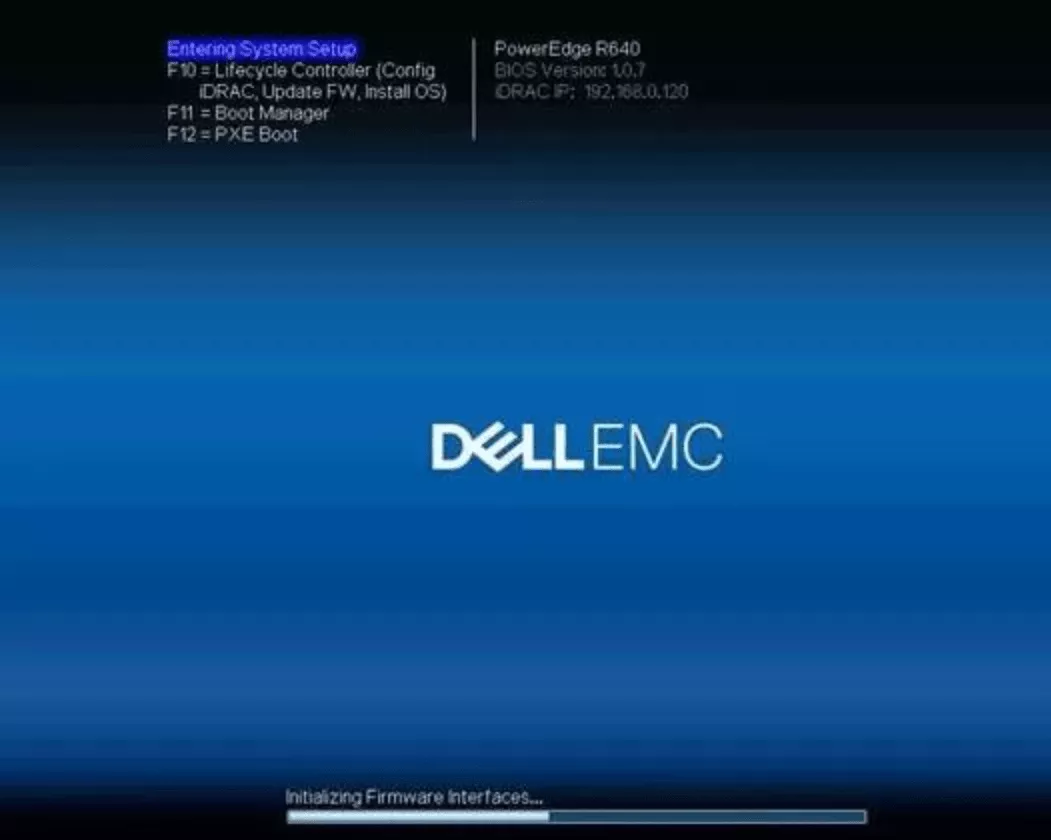
在下次引导那里选择BIOS设置,然后在左侧点击电源选择重启服务器,然后按照页面提示进入服务器BIOS设置。
或者是按DEL或者F2键进入BIOS
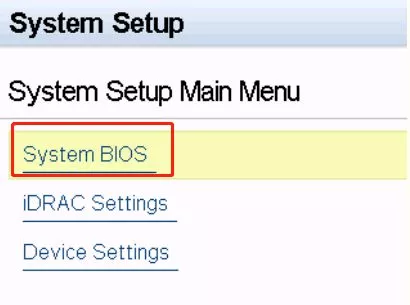
选择system bios
选择System Profile Settings

在System Profile下拉框中选择Performance(OS)

截图截错了,是要选择带OS的选项,该选项意思是由系统相关软件控制CPU频率,这样是最好的,因为你不知道小厂的BIOS到底设置些什么。
系统设置
如果你用的是E5系列的CPU,我建议大家安装Ubuntu20.04,亦或者是Debian11,这两个系统我反复测试下来是对CPU兼容最好的(性能释放)再往上的系统版本,内核基本上6.0,我反正在这些系统上使用PHP,渲染时间直接翻倍。
换源
软件源是一定要更换的,根据自己的系统及版本选择合适的源,我建议是清华的,速度比较快。
清华大学开源软件镜像站 | Tsinghua Open Source Mirror
以我现在的Debian11为例,在路径/etc/apt下,找到sources.list,清空里面的内容,然后粘贴下面的代码
# 默认注释了源码镜像以提高 apt update 速度,如有需要可自行取消注释
deb http://mirrors.tuna.tsinghua.edu.cn/debian/ bullseye main contrib non-free
# deb-src http://mirrors.tuna.tsinghua.edu.cn/debian/ bullseye main contrib non-free

deb http://mirrors.tuna.tsinghua.edu.cn/debian/ bullseye-updates main contrib non-free
# deb-src http://mirrors.tuna.tsinghua.edu.cn/debian/ bullseye-updates main contrib non-free

deb http://mirrors.tuna.tsinghua.edu.cn/debian/ bullseye-backports main contrib non-free
# deb-src http://mirrors.tuna.tsinghua.edu.cn/debian/ bullseye-backports main contrib non-free

# 以下安全更新软件源包含了官方源与镜像站配置,如有需要可自行修改注释切换
deb http://mirrors.tuna.tsinghua.edu.cn/debian-security bullseye-security main contrib non-free
# deb-src http://mirrors.tuna.tsinghua.edu.cn/debian-security bullseye-security main contrib non-free
然后终端依次输入
apt clean
apt update
apt upgrade
reboot
重启服务器(物理机重启一次是需要等好几分钟,别急)。
安装cpufrequtils
终端输入以下命令进行软件安装。
sudo apt-get install cpufrequtils该软件常用命令:
- cpufreq-info :查看CPU状态;
- sudo cpufreq-set -c 0 -g performance: 设置指定CPU的状态。-c 1 指定要设置的 CPU 核心编号。 0表示第1个 CPU 核心; -g performance 设置CPU状态为 performance;
- sudo cpufreq-set -c 1 -d 900MHz: 设置指定CPU的状态, -d 900MHz 指定CPU 最低频率;
- sudo cpufreq-set -c 2 -u 2.6GHz: 设置指定CPU的状态, -u 2.6GHz 指定CPU 最高频率;
编写脚本
编写set_cpu_performance.sh文件,并通过sudo chmod +x set_cpu_performance.sh赋予可执行权限
#!/bin/bash
# Check if cpufrequtils package is installed
if ! [ -x "$(command -v cpufreq-set)" ]; then
  echo "Error: cpufrequtils package is not installed. Please install it first."
  exit 1
fi

cpu_mode=performance
#cpu_mode=powersave

# Get the number of CPU cores
cpu_cores=$(nproc)

# Set performance mode for each CPU core
for ((cpu=0; cpu<$cpu_cores; cpu++));
do
  sudo cpufreq-set -c $cpu -g ${cpu_mode} #设定各核心为高性能模式
  sudo cpufreq-set -c $cpu -d 2.4GHz #设定各核心的最低频率,根据自己CPU的信息去修改
done

# Verify the current CPU frequency governor
cpufreq-info --policy | grep "current policy"

echo "Curent CPU(${cpu_cores}) are ${cpu_mode}."
# cat /proc/cpuinfo | grep processor | wc -lcpu_mode:可以在powersave、performance切换cat /proc/cpuinfo | grep processor | wc -l: 获取当前CPU总个数,或者使用lscpu来查看
终端输入bash set_cpu_performance.sh即可。
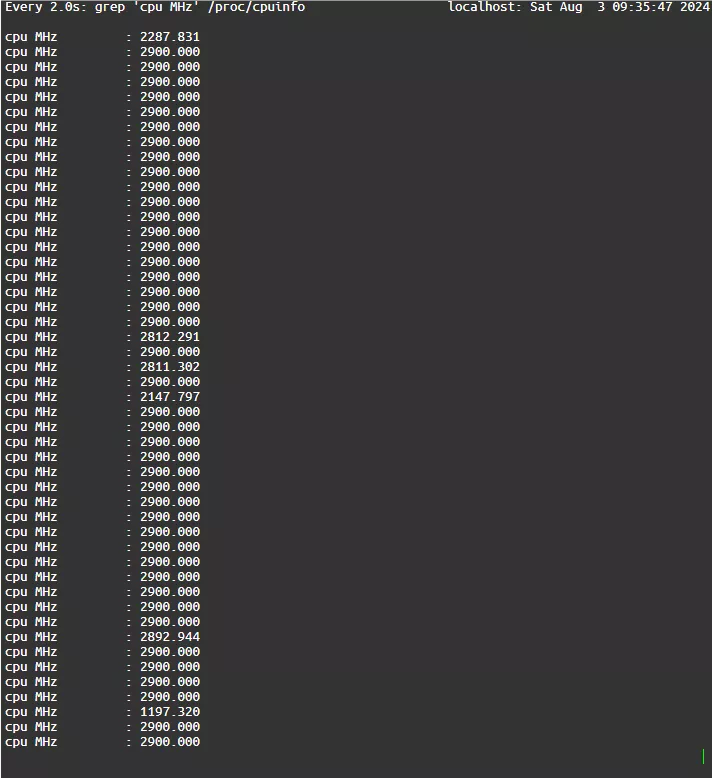
最后输入watch grep \'cpu MHz\' /proc/cpuinfo即可在终端实时查看CPU频率了
这个软件其实比较老了,建议安装cpupower,具体教程可以参考:Debian/Ubuntu Linux调节CPU频率工具安装 cpupower-ღ星晴
体验
相比较默认设置,宝塔安装1-2分钟,MySQL PHP NGINX等环境编译安装基本上快30%左右,PHP渲染快40%,肉眼可见的性能提升。


暂无评论内容